The first step when getting started with IRIS KashFlow Connect is setting up your account and client default. This guide will talk you through all the required steps. If you’ve not already done so register for an account by click here.
Default Nominals
The first step is to prepare your default nominal codes for clients that you create in IRIS KashFlow Connect. KashFlow comes prepared with a standard chart of accounts however you can modify it as appropriate. Access this page by going to IRIS KashFlow Connect > Settings > Nominals
From this page use the following options to create and edit a nominal set;
- +Nominal Set – To create a new set then hit the Add icon (next to name of current nominal set) and enter Name, and what set you would like to duplicate from. If you’re looking to start from scratch then choose any set to duplicate from.
- Delete Set – Click the Rubbish icon to completely remove the set. Use with precaution as no Nominal Set can be recovered if Deleted.
- Add Code – Add a new code to the current nominal set.
- Export – Export your nominal set to excel spreadsheet.
- Pencil icon – Edit an existing code in your nominal set.
- Rubbish icon – Delete code is found next to the pencil icon. This will remove this code from only the nominal set you have displayed. Please use with precaution as no codes can be recovered if deleted.
Default Settings
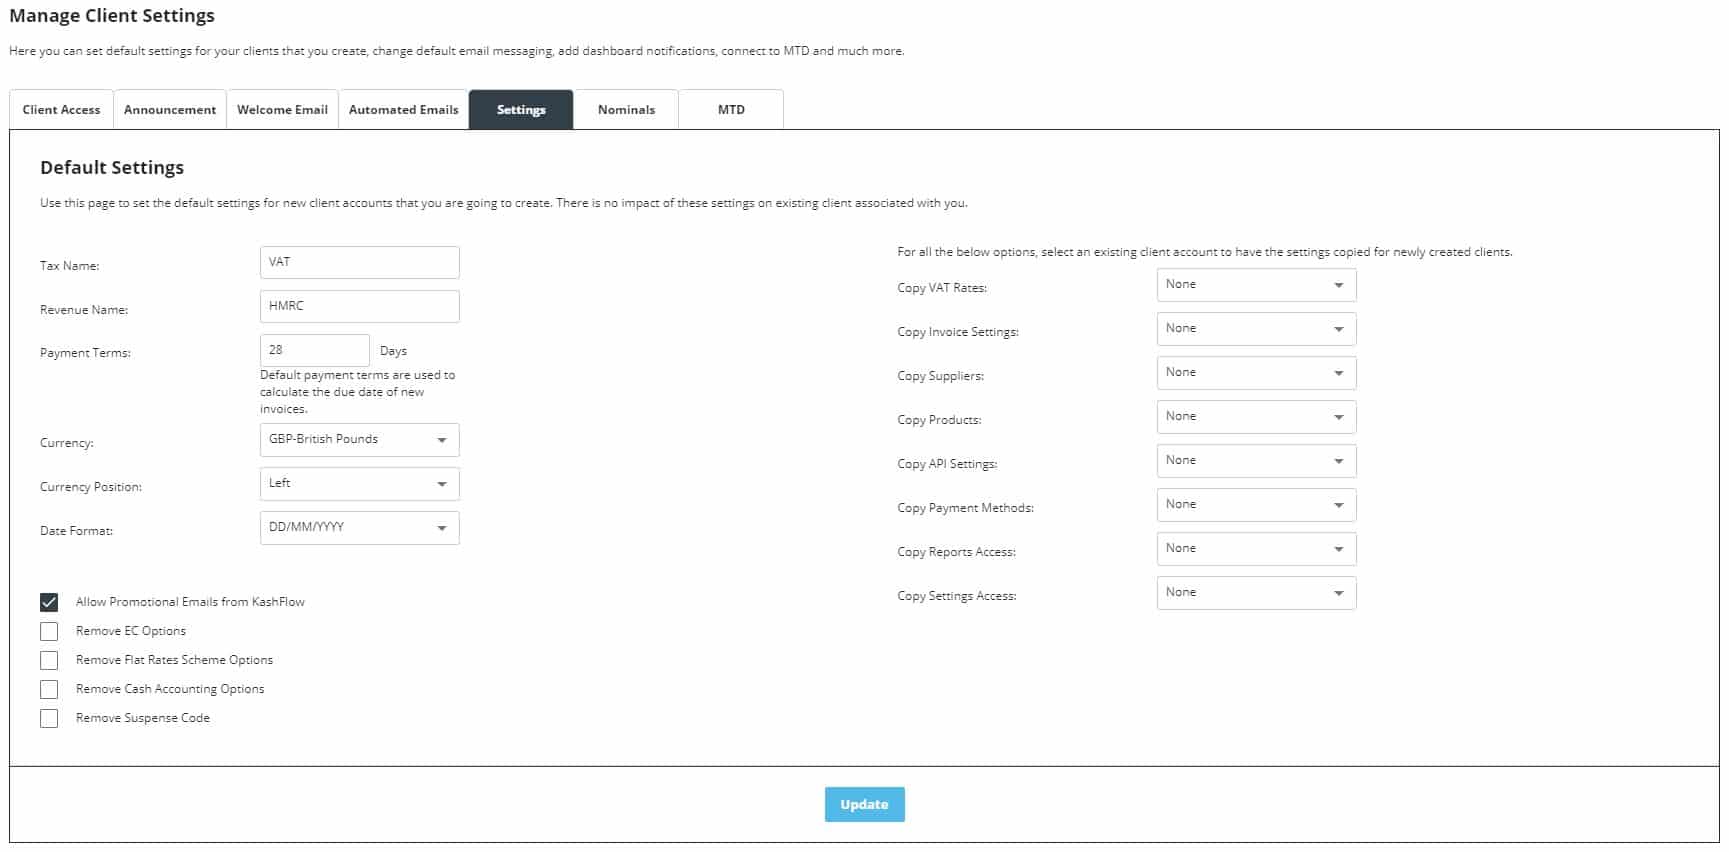
The Default Settings page allows you to define a set of default settings that all new clients that you create will be set up with. This can be used to disable access to certain settings (i.e. VAT options, lock transactions) or if you’re based outside the UK to create clients with your local settings. Similarly, you can copy parts of another clients account (i.e. suppliers, products). Access this by going to IRIS KashFlow Connect > Settings > Settings.
Use this page to set the default settings for new client accounts that you are going to create. There is no impact of these settings on existing client associated with you.


