Welcome to your new IRIS KashFlow Connect.
We have been hard at work developing a new, faster, modern KashFlow Connect and are happy to announce that we’re ready to introduce this to your workflow. This page is a centralised resource where you can find out what’s new in the new application, changes, new functionality, and support resources.
What’s New?
High Level overview – Changes
- The main changes to the software comprise of a new UI and new UX, a new apps page and the removal of legacy information.
- Removal of Promote and Resources tab.
- Some settings, Default Nominal, Default Settings and Your Account combined into global client settings. You will now find this under the Settings Tab.
- Other settings such as Branding, Your Invoices and Client Managers moved to My Account in the top right corner of your screen.
Client screen
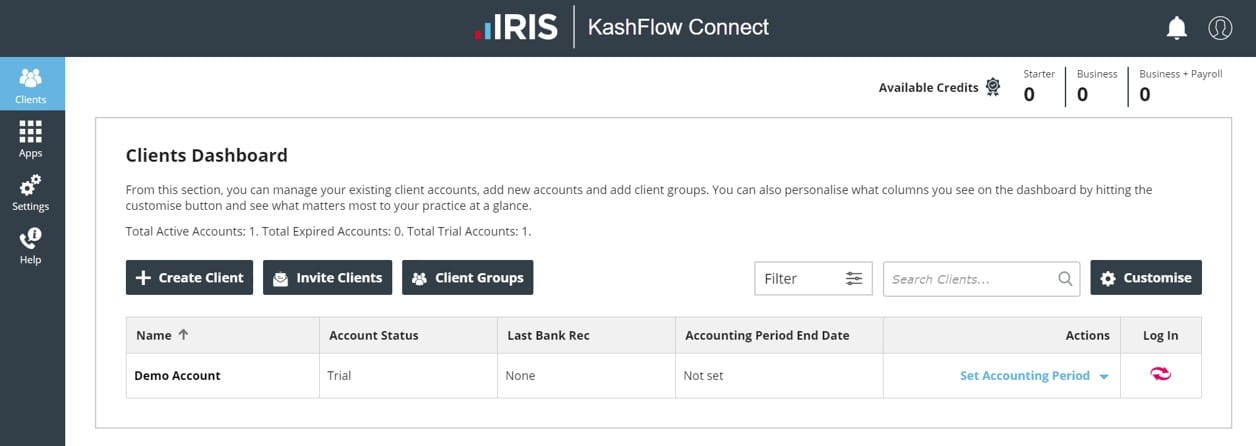
- New Licence counter for Starter, Business, and Business + Payroll Licences – This gives you more exposure to your licenses.
- New filter option – clicking on any of the table headers will filter your clients. The filter option will stay even if you leave the page.
- Search bar – We just need the first 3 characters of your client’s name or company name to carry out a search.
- Customise button – This allows different columns to be displayed on your client’s screen. This means your client dashboard can be more relevant to what you want to see.
- Call to action column – Upgrade a license or renew it, reports, set accounting period end. We will display an Action column, so you don’t have to worry about your clients expiring or if they haven’t set any accounting periods.
- Invite Clients and Client Groups are included.
In the client screen
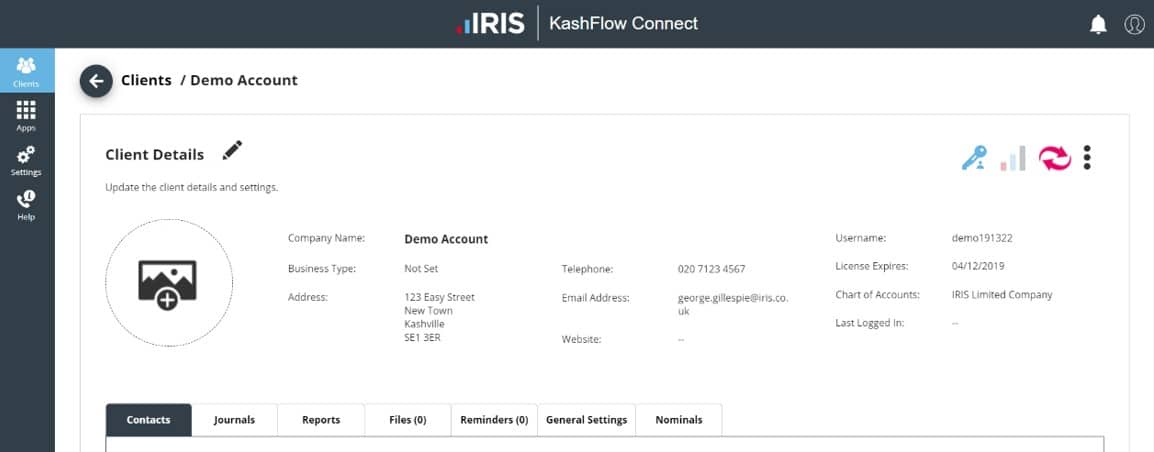
- Contacts – You can add contacts to your clients.
- Journals – Journals surfaced so they’re easier to see and use. You can now search your client’s journals from the client’s screen.
- Reports – We’ve combined your reports with your management reports.
- Files – Enhanced integration with OpenSpace. We will show files uploaded to OpenSpace if you as the accountant have connected your OpenSpace account to your KashFlow Connect (under the apps page) and then selected the client from the list in the General Settings tab.
- Reminders – these reminders will trigger the bell in the top right corner next to the Your Account icon.
- General Settings – Client manager & Client group, OS Client account, VAT information.
- Nominals – Nominal structure for this client.
- IRIS Logo – Clicking on this will open your OpenSpace account in a new tab.
- KashFlow logo – Log into the KashFlow Bookkeeping account for this client.
- Pencil icon – Edit details for your client. Address, Email Address, Telephone number.
- Photo – Can upload the client photo or logo. This will not reflect in KashFlow Bookkeeping as this is done through Branding, however, should your client upload a logo in their account you will see this reflected in your KashFlow Connect Account.
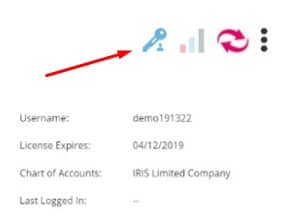
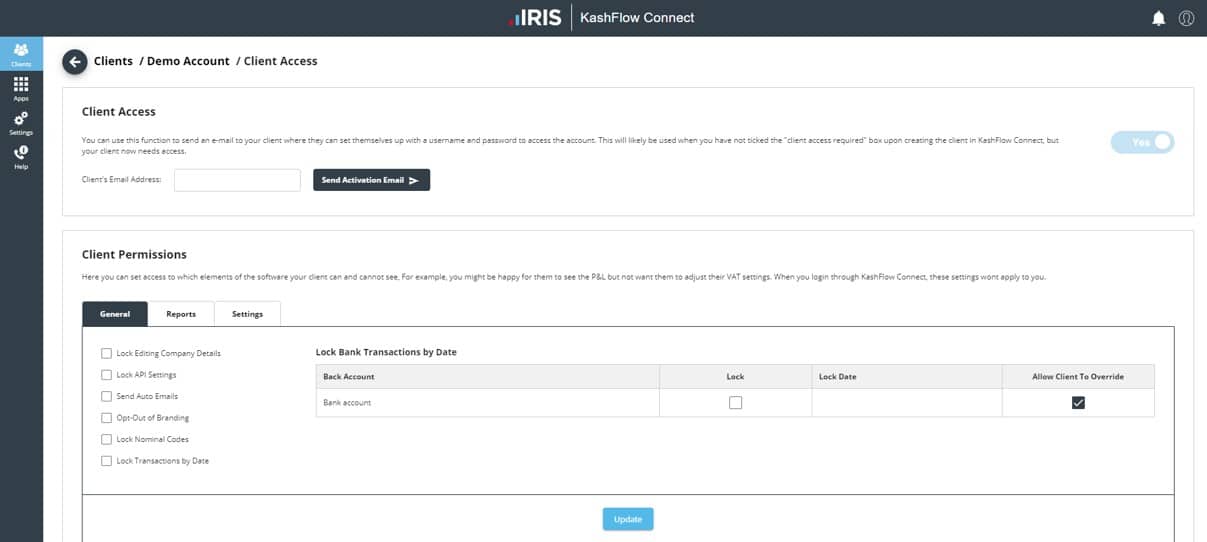
Client access (Key icon)
- Locking certain dates, settings, and reports
- Allowing the client to have access to the system (if for example, on client set up “allow account access” hasn’t been tested
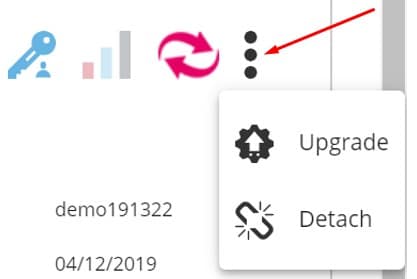
Three dots
- Renew/Upgrade – Renew or Upgrade your client’s license.
- Detach – Detach a client from your client list.
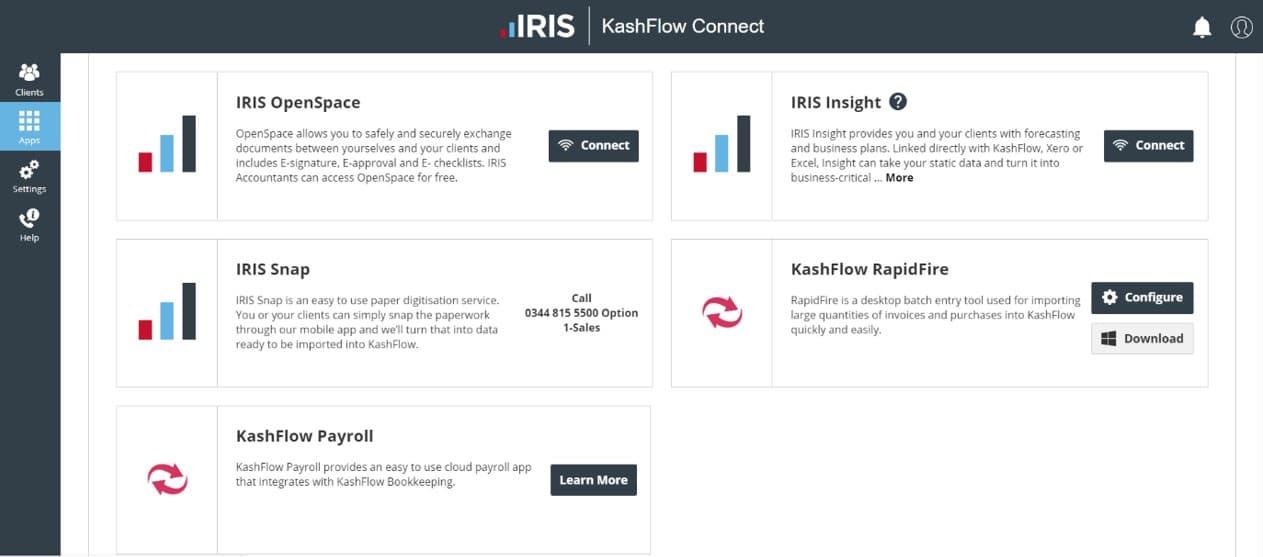
Apps page
- IRIS OpenSpace – Connect your OpenSpace account to your KashFlow Connect.
- IRIS Insight – Connect to IRIS Insight.
- IRIS Snap – Integration planned by IRIS snap team.
- KF Payroll – Integration information for KashFlow Payroll.
Default Settings (Cog icon)
- Default client access – The default options for your clients. You can change your settings per client from the client’s page.
- Announcement text – The text your clients will see when they login.
- Welcome email – This is the introduction email when you bring new clients onboard. Due to the slight change in the set up of KashFlow Connects welcome emails. We’d recommend checking this setting should you have this tweaked in the older version.
- Auto emails – All automated emails that come out of KashFlow Connect.
- Default settings – You can again change anything directly on your clients page.
- Nominals – Your customer nominal code structure. You will have a few default structures set up for you.
- MTD connection – Connect to the MTD service provided by HMRC.
- If you’ve embedded a video code into KashFlow Connect Version 1, you’ll need to copy and paste the video code into KashFlow Connect Version 2.
To do this copy your embedded code from the “announcement” tab in “settings”
You can then click “Insert” > “media” and then paste your code. It will now appear as a video
You will then see something like this…
Help Page
- Knowledge Base Search
- Sales telephone number
- Customer Support telephone number
- Remote support access – We will sometimes ask for access to your KashFlow Connect account to replicate a reported issue. This switches off every Sunday if left on ticked throughout the week.
My account (Face icon)
- My account – Here you will find your Details, Credits, Change Password.
- Branding settings – Logo and Colours, Reports, Login Code.
- Client Managers – Add client managers and assign clients to them.
What’s Next?
- Enhanced client managers – We’re looking to strongly improve the Client Managers feature.
- Bulk Actions – We’re looking to introduce Bulk Actions which will save you time and improve your workflow through KashFlow Connect
- VAT tab and MTD – We’re always working on VAT, but also focusing on a VAT tab in your KashFlow Connect account, so you can see at a glance your client’s VAT.
Help & Support
Help and support for the new KashFlow is available as usual from the friendly KashFlow support team, reachable by emailing [email protected], Live Chat or call us on 0333 003 0156 Option 2, Option 2. Please note that this telephone number is for KashFlow Connect users only.
We’ve updated the KashFlow Support Knowledge Base articles to reflect these changes and will be supporting the new application there as standard.
If you feel you need training on the new KashFlow Connect then please do let us know on [email protected].

