The next steps will enable the payment processor. To access these, click Settings > Receiving Payments. Select your payment processor from the options listed.
This will open the settings screen for the chosen provider where you will need to type in details relating to your account with the payment processor. If you need assistance with any of the details requested please contact your payment processor provider.
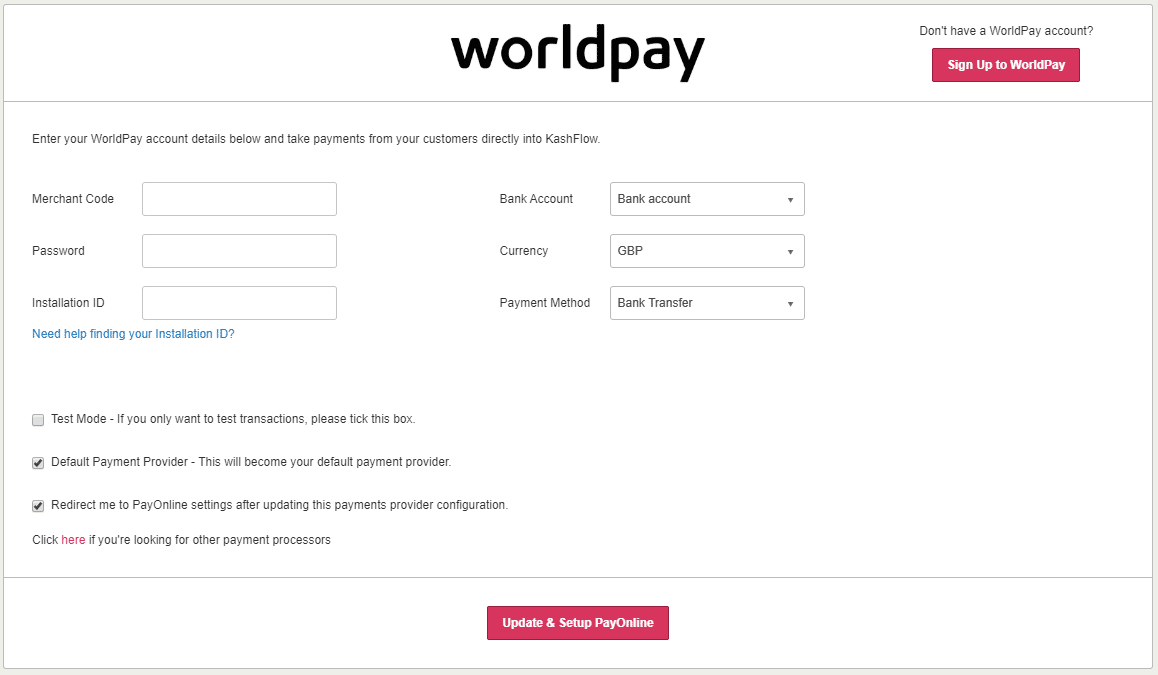
- Select the bank account that you would like to record the payments as going into
- Select the currency of your payments (please note that KashFlow does not currently support multi-currency bank accounts, this means that the currency should be the same as your selected bank account.
- Select the payment method you would like to record these payments as (you can set up payment methods by going to Settings > Payment Methods)
- If you would like to test your connection to the payment processor only then tick the box for test mode. Please note: When test mode is enabled payments will not be collected from your customers.
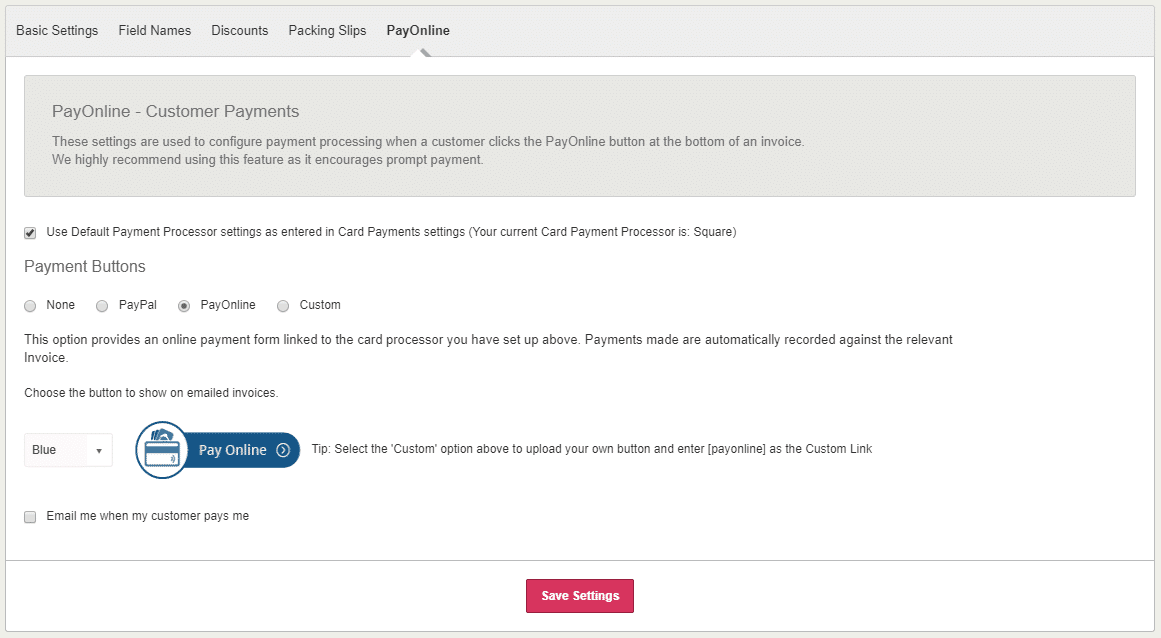
- If you would also like to use this processor for Pay Online Button on Invoice payments then tick “Redirect me to PayOnline settings………..”. Once you have completed setting up the payment processor you will be taken to Settings | Invoice Options | PayOnline. Here you can configure how the PayOnline button on invoices will behave: